This blog post would provide a comprehensive guide for users who are looking to migrate their emails from Windows Live Mail to Outlook. The post could cover topics such as:
Why migrate from Windows Live Mail to Outlook?
There are several reasons why a user might want to migrate from Windows Live Mail to Outlook. Here are some of the most common reasons:
Better integration with Microsoft Office
Outlook is part of the Microsoft Office suite of applications, which means that it integrates seamlessly with other Microsoft products such as Word, Excel, and PowerPoint. This can be especially beneficial for users who rely heavily on these programs for work or personal use.
Improved email management features
Outlook offers a wide range of email management features that are not available in Windows Live Mail, such as advanced search capabilities, email rules, and automatic replies. These features can help users stay organized and save time when managing their email accounts.
Enhanced security
Outlook has robust security features that can help protect users from email threats such as phishing attacks, malware, and spam. These features include built-in filters, encryption, and antivirus software integration.
Access to Exchange Server
Outlook is designed to work with Microsoft Exchange Server, which is a popular email and collaboration platform used by many businesses. By using Outlook, users can access Exchange Server features such as shared calendars, contacts, and tasks.
Support for larger mailbox sizes
Outlook supports larger mailbox sizes than Windows Live Mail, which can be helpful for users who receive a large volume of emails or have a large archive of old emails.
Overall, migrating from Windows Live Mail to Outlook can provide users with access to a wider range of features, improved email management capabilities, and enhanced security.


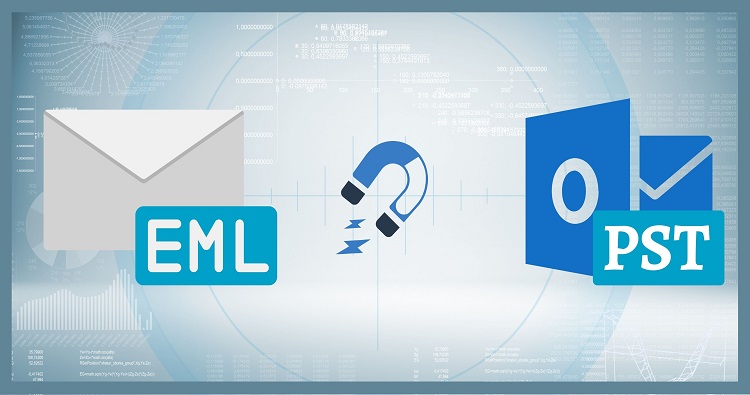
Understanding the difference between Windows Live Mail and Outlook file formats
When migrating from Windows Live Mail to Outlook, it’s important to understand the difference between the file formats used by each email client. Windows Live Mail uses the .eml file format, while Outlook uses the .pst file format.
EML file
The .eml file format is a standard file format used for storing email messages. Each .eml file represents a single email message and includes the message content, headers, and attachments. Windows Live Mail stores email messages in individual .eml files, which are stored in a folder structure on the user’s computer.
PST file
On the other hand, the .pst file format is a proprietary file format used by Microsoft Outlook to store email messages, contacts, calendar items, and other data. The .pst file contains all the data for a user’s Outlook profile, and can be used to backup, archive, or migrate data between different computers or Outlook versions.
When converting emails from Windows Live Mail to Outlook, the .eml files need to be converted into the .pst file format. This can be done using a third-party tool or by manually importing the .eml files into Outlook.
It’s important to note that when importing .eml files into Outlook, the folder structure and other metadata may not be preserved, so users may need to reorganize their email folders and categories in Outlook after the conversion process.
Read more about the Top 5 Best EML to PST Converter
Step-by-step instructions on how to convert emails from Windows Live Mail to Outlook
Step 1: Export emails from Windows Live Mail
- Open Windows Live Mail and select the email account that you want to export.
- Click on the “File” tab and select “Export” -> “Email messages”.
- Choose the format as “Microsoft Exchange”.
- Choose the folder where you want to save the exported file and click “Next”.
- Wait for the export process to complete.
Step 2: Import emails into Outlook
- Open Microsoft Outlook and click on “File” -> “Open & Export” -> “Import/Export”.
- Select “Import from another program or file” and click “Next”.
- Choose “Outlook Data File (.pst)” as the file type and click “Next”.
- Select the .pst file you created in Step 1 and click “Next”.
- Choose the email account where you want to import the emails and click “Finish”.
- Wait for the import process to complete.
Step 3: Verify the imported emails
- Open the email account in Outlook where you imported the emails.
- Check the folders where the imported emails should be located and verify that they have been imported correctly.
- Check that the metadata such as email headers, attachments, and timestamps have been preserved.
Step 4: Reorganize email folders and categories (if necessary)
- If the folder structure or categories were not preserved during the import process, reorganize them manually.
- You can create new folders and drag and drop emails into them to reorganize your email account in Outlook.
By following these steps, you should be able to successfully convert your emails from Windows Live Mail to Outlook. If you encounter any issues during the conversion process, refer to the troubleshooting section of your chosen conversion tool or seek technical support.
Troubleshooting common issues during the conversion process
Here are some common issues you may encounter during the conversion process from Windows Live Mail to Outlook and some troubleshooting steps to address them:
The conversion tool not working
If you are using a third-party conversion tool and it is not working properly, try closing and reopening the tool or restarting your computer. If the issue persists, try reinstalling the conversion tool or contact the support team for assistance.
Missing emails or attachments
If you find that some emails or attachments are missing after the conversion process, check that you have selected the correct source and destination folders. Also, make sure that the source files are not corrupted or damaged.
Folders or categories not preserved
If you find that the folder structure or categories have not been preserved during the conversion process, try manually reorganizing the folders in Outlook. You can create new folders and drag and drop emails into them to reorganize your email account in Outlook.
Slow conversion process
If eml to pst conversion process is taking too long, try closing other programs or applications that are running in the background. You can also try using a different computer or upgrading your hardware to improve performance.
Error messages during the conversion process
If you encounter error messages during the conversion process, try searching for the specific error message online to find possible solutions. You can also contact technical support for assistance.
It’s important to note that conversion issues can sometimes be caused by the specific version of Windows Live Mail and Outlook being used, as well as the configuration settings on the computer. If you encounter any issues during the conversion process, seek technical support or consult online forums for guidance.
Tips for a seamless email migration experience
Here are some tips for a seamless email migration experience:
Backup your data
Before starting the migration process, backup all your important data including email messages, contacts, calendars, and any other important information. This will ensure that you can recover your data in case of any unexpected issues during the migration process.
Learn about How to backup Windows Live mail
Check the compatibility
Ensure that the email client you want to migrate to is compatible with your current email client. Check the system requirements of the new email client to make sure it will work on your computer.
Choose the right migration tool
Select a reliable and efficient email migration tool that can transfer your emails, contacts, calendars, and other data without any data loss or corruption. Do some research and read reviews of different migration tools before selecting one.
Follow the instructions
Carefully read and follow the instructions provided by the migration tool. This will help you avoid any mistakes or data loss during the migration process.
Clean up your data
Before starting the migration process, remove any unnecessary or outdated data from your current email client. This will make the migration process faster and smoother.
Test the migration
After the migration process is complete, test the new email client to ensure that all your data has been successfully migrated. Check that your email messages, contacts, calendars, and other data are all present and that you can access them without any issues.
Keep the old data for a while
Keep a backup of your old data for a few weeks after the migration process. This will give you time to ensure that everything is working properly in the new email client, and you can refer to the old data if you encounter any issues.
By following these tips, you can ensure a seamless email migration experience with minimal disruption to your work or personal life.
Conclusion
This blog post would be helpful for individuals or businesses that are looking to switch to Outlook from Windows Live Mail and need guidance on how to transfer their email data. We suggest Shoviv EML to PST Converter tool, to convert or migrate from Windows Live Mail to Office 365 and Live Exchange server
Frequently Asked Questions
-
How do I transfer my Windows Live Mail to a new computer?
To transfer your Windows Live Mail to a new computer, you need to back up the email data on your current computer and then restore it on the new computer. First, create a backup of your Windows Live Mail data by copying the folder containing your email data to an external hard drive or cloud storage. Then, on the new computer, install Windows Live Mail and copy the backup folder to the same location on the new computer. Finally, open Windows Live Mail and your email data should be restored.
-
Can Windows Live Mail open PST files?
No, Windows Live Mail cannot open PST files natively. PST files are a proprietary file format used by Microsoft Outlook. To access PST files, you need to use Microsoft Outlook or a third-party tool that can open PST files. If you want to import PST files into Windows Live Mail, you need to convert the files to a compatible format, such as EML, using a conversion tool
-
How do I convert Windows Live Mail to PST?
To convert Windows Live Mail to PST, you can use a third-party conversion tool like Shoviv Windows Live Mail to PST Converter. First, install and launch the software on your computer. Next, select the Windows Live Mail folder containing your email data and choose the destination folder where you want to save the converted PST file. Then, click on the “Convert” button to start the conversion process.
-
How do I export emails from Windows Live?
To export emails from Windows Live Mail, first, open the email client and select the folder containing the emails you want to export. Then, click on the “Export” button in the top menu and choose the file format you want to export the emails to, such as EML, PST, or CSV. Next, select the location where you want to save the exported file and click on the “Export” button to start the export process.