If you’ve encountered the dreaded “Outlook inbox full” message, do not worry. You’re not alone, and this is a common challenge for many email users. Outlook is designed to handle a significant amount of data, but it’s not unlimited. As our inboxes swell with emails, attachments, and calendar items, we may hit the storage limit. To avoid running into issues with sending or receiving messages, it’s important to manage the size of your mailbox effectively. One such management strategy is archiving emails. In this blog, we’ll guide you through the process of archiving emails in Outlook to help you make space in your full inbox.
Understanding the Need to Archive
Before diving into the archiving process, let’s understand why it’s necessary. An overfull inbox can slow down your Outlook performance and, in the worst case, prevent new emails from arriving. Archiving emails helps in:
- Reducing the mailbox size.
- Freeing up space on the mail server.
- Improving Outlook’s performance.
- Keeping your important emails organized for future access.

Steps to Archive Emails in Outlook
1. Manual Archiving
Outlook’s manual archiving feature allows you to move items to an archive folder.
Step-by-Step Manual Archiving
- Navigate to the ‘File’ tab.
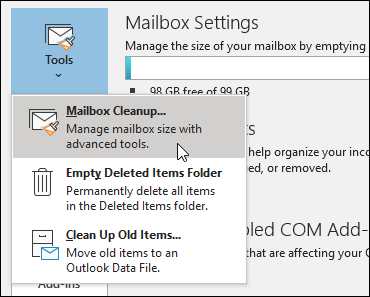
- Click on ‘Info’ and select ‘Clean-up Tools’.
- Choose ‘Archive’.
- Select the folder you want to archive. For archiving the entire inbox, click ‘Inbox’.
- Choose a date under ‘Archive items older than’.
- Click ‘Browse’ to select the location to save your archive file or go with the default one.
- Finish by clicking ‘OK’.
Your selected items will now move to the designated archive folder.
2. AutoArchive Settings
AutoArchive is a feature that automatically moves old emails to the archive folder at regular intervals.
Configuring AutoArchive in Outlook
- Click the ‘File’ tab and select ‘Options’.
- In the Outlook Options dialog box, click ‘Advanced’.
- Scroll down to the AutoArchive section and click ‘AutoArchive Settings’.
- Choose how often you want the AutoArchive to run and specify how old the items must be to get archived.
- Make selections on what to do with the archived items, like deleting expired items or moving them to the archive folder.
- Select ‘OK’ to apply the settings and close the dialog boxes.
3. Archive to PST File
PST files are Outlook data files that store your emails locally on your computer.
Creating a PST File for Archiving
- Under the ‘Home’ tab, click on ‘New Items’.
- Go to ‘More Items’ and then ‘Outlook Data File’.
- Enter a name for your PST file and select a location to save it.
- Click ‘OK’.
Now, you can drag and drop emails from your inbox to the newly created PST file.
4. Outlook 365 Online Archiving (for Microsoft 365 users)
Office 365 offers an online archiving feature for enterprise users to help keep the inbox lean.
Enabling Online Archiving
- Log in to the Microsoft 365 admin center.
- Navigate to the ‘Exchange admin center’.
- Go to ‘recipients’ and select the mailbox to enable archiving.
- In the details pane, click ‘enable’ under ‘In-Place Archive’.
- After the archive mailbox is created, users can move items to it using Outlook or Outlook on the web.
Best Practices for Email Archiving When Outlook inbox full:
- Regularly clean up your inbox by deleting unnecessary emails.
- Unsubscribe from newsletters or promotional emails that aren’t needed.
- Set up rules for automatic sorting and archiving of incoming emails.
- Periodically review your archive folders to delete anything no longer necessary.
Also Read: How to archive emails in Outlook 365 online
Conclusion
Archiving is an essential practice for managing a full Outlook inbox, ensuring that essential emails are preserved without clogging up your primary inbox. Whether using the manual method, AutoArchive, PST files, or the Outlook 365 Online Archive feature, remember that archiving is a process that can save you from future hassles with storage limits and improve the performance of your Outlook experience. So take some time to set it up today, and enjoy a more efficient email management system.


