In Microsoft 365, there are scenarios where users need to read and manage permissions in another user’s mailbox. This can be necessary for various reasons, such as an assistant managing an executive’s emails or a team member accessing shared information. This guide covers how to set up mailbox permissions, send emails from another user’s mailbox, read emails in another user’s mailbox, and send emails on behalf of another user.
Set Up Mailbox Permissions
Using the Admin Center
- Log in to the Admin Center: Go to Users > Active Users.
- Select the User: Choose the user whose mailbox you want to delegate.

- Expand Mail Settings: In the user properties pane, navigate to the Mail tab.
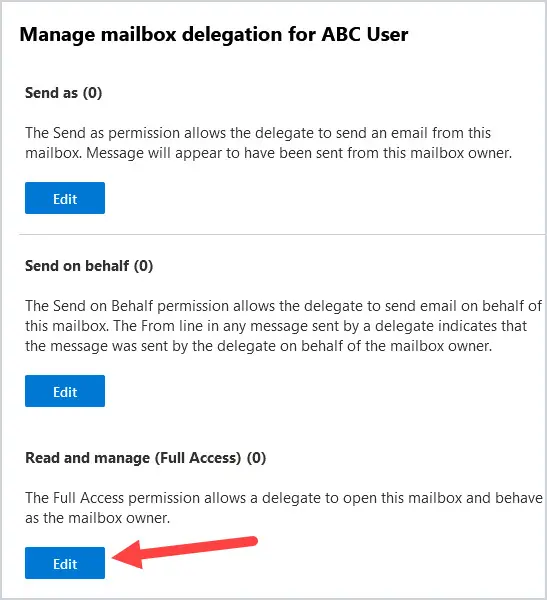
- Edit Mailbox Permissions: Click on Edit next to mailbox permissions and choose the permission type needed (e.g., Read and Manage). Select +Add Permissions, browse the users you want to add, and save the changes.
Using PowerShell
- Connect to Exchange Online: Use the Connect-ExchangeOnline cmdlet to initiate a session.
- Use Add-MailboxPermission Cmdlet: Execute the Add-MailboxPermission cmdlet to assign permissions. For example, to give Full Access permissions, run:
Add-MailboxPermission -Identity "ABC User" -User "123 User" -AccessRights FullAccessThis command fully grants the user 123 User access to the mailbox ABC User.
Send Email from Another User’s Mailbox
This is suitable if the other user needs to manage your emails and send them while appearing directly from your address.
Scenario 1: Granting Send As Permissions Outlook Full Access Permissions (EAC):
Using the Admin Center
- Log in to the Microsoft 365 admin center with administrative privileges.
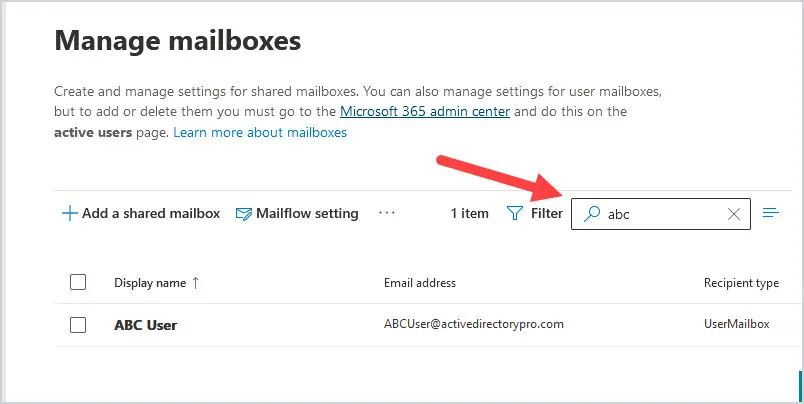
- Locate the “Users” section and select “Active users.”
- Search for the user you want to grant access to and select them.
- Click on “Mailbox settings” and then select “Edit” next to “Mailbox permissions.”
- Under “Mailbox Delegation,” choose the appropriate permission level:
- Send As: Allows sending emails with your address as the sender.
- Full Access: Grants complete control over the mailbox, including sending emails as you.
- Click “Edit” next to the chosen permission level and select “Add permissions.” Choose the user you want to grant access to and click “Add” to confirm.
- Click “Save” to finalize the permission assignment.
Using PowerShell
Execute a PowerShell command like:
Add-RecipientPermission -Identity "ABC User" -Trustee "123 User" -AccessRights SendAsThis allows 123 User to send emails as ABC User.
Scenario 2: Shared Mailbox and Send on Behalf (Not using EAC):
If you need a collaborative mailbox with “Send on Behalf” functionality, a shared mailbox is the way to go. However, you cannot manage Send on Behalf permissions for shared mailboxes directly through EAC.
Here’s the process (EAC can be used for initial mailbox creation):
- Create a Shared Mailbox: Contact your IT administrator to create a shared mailbox with the desired name and address.
- Grant Permissions: The administrator will also grant necessary permissions to users who need to access and send emails from the shared mailbox. This can include “Full Access” or “Send As” permissions.
- Sending on Behalf: While EAC won’t manage “Send on Behalf” for shared mailboxes, some email clients (e.g., Outlook with additional configuration) allow users with “Send As” permissions to specify “Send on Behalf of” when composing emails from the shared mailbox address.
Important Notes:
- Granting mailbox access should be done judiciously and only to authorized users.
- Refer to your organization’s IT policy regarding mailbox permissions.
- If unsure about the best approach, consult your IT administrator for assistance.
Read Email in Another User’s Mailbox
Once you have granted Full Access permissions using either the Admin Center or PowerShell, the designated user can open the other user’s mailbox.
Adding the Mailbox to Outlook
- Open Outlook: Go to File > Account Settings > Account Settings.
- Advanced Settings: On the Email tab, select Change > More Settings > Advanced tab.
- Add the Mailbox: Under Open these additional mailboxes, select Add, enter the mailbox name, and confirm.
Send Email on Behalf of Another User
Granting “Send on Behalf” permissions allows a delegate to send emails on behalf of another user. Recipients see these emails as being sent by “User A on behalf of User B”.
Using Delegate Access
- Delegate Access Setup:
- Go to File > Info > Account Settings > Delegate Access.
- Select Add, find the person’s name, and set the permissions for Calendar, Tasks, Inbox, Contacts, and Notes to None, then confirm.
- Adding the Mailbox to Outlook:
- Similar to the steps above for reading emails, add the other user’s mailbox to your Outlook profile.
- Sending an Email on Behalf:
- Compose a new email, click From above the To line, select the mailbox of the other user, compose the message, and send it. If From isn’t visible, enable it by going to the ribbon and selecting Options > From.
Also Read: How to Use Outlook Categories to Organize Emails Like a Pro?
Summing It All Up:
Focus on giving mailbox permissions to another user in Office 365; or shared mailboxes for sending emails from another account in a secure and approved manner. These methods offer flexibility and control over mailbox access while maintaining security. By following the above steps, you can efficiently read and manage permissions, send emails from another’s mailbox, read emails within different mailboxes, and send emails on behalf of other users in Microsoft 365. Each method, whether through the Admin Center or PowerShell, ensures robust and flexible access control tailored to organizational needs.